This planned Blog-Series is dedicated to Power BI with Paginated Reports. The first part handles who to start with this Feature.
Paginated Reports are known from Reporting Services to create pixel perfect fitting reports, especially for Printouts and it is more an Feature of Power BI. Before Power BI comes to on premises, it was the only web reporting technology on the Microsoft BI Stack – to be honest, Microsoft Mobile Reports is was only a technology that was used from SSRS 2016 to Microsoft Power BI SSRS – launched in 2017.
So, Paginated Reports is not a new technology and you find in the internet a whole bunch of information how it can be used, and which features are included. Actually, this Power BI Feature is only for testing and it is not GA. So many data sources and features are not supported, you’ll find more information at https://docs.microsoft.com/en-us/power-bi/paginated-reports-faq
Okay, let’s start to create our first report:
- You need a Power BI Tenant with a
Pro License
You can also create a Office 365 Trial Tenant
https://signup.microsoft.com/Signup?OfferId=02f65c1d-8b54-4d83-8941-fff22869499c&dl=ENTERPRISEPREMIUM_NOPSTNCONF&ali=1 - You need a paid Azure Tenant on a
corporate mail address.
If you create a trial on Office 365, you can also use the behind azure tenant https://portal.azure.com and create a trial with USD 200 for free.
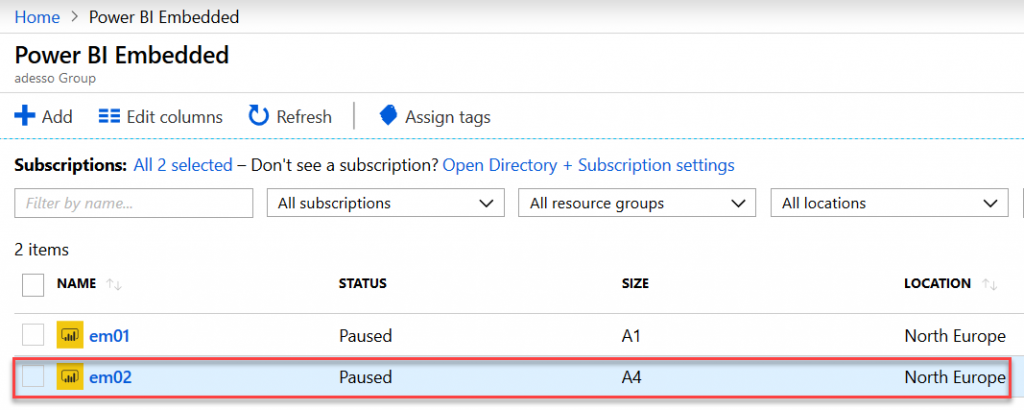
After completing this prerequisite, you can create a Embedded Resource, which handles the workload for the Paginated Reports – at least it must be minimum an A4, this Plan covers the P1 resource from the Premium Plans.
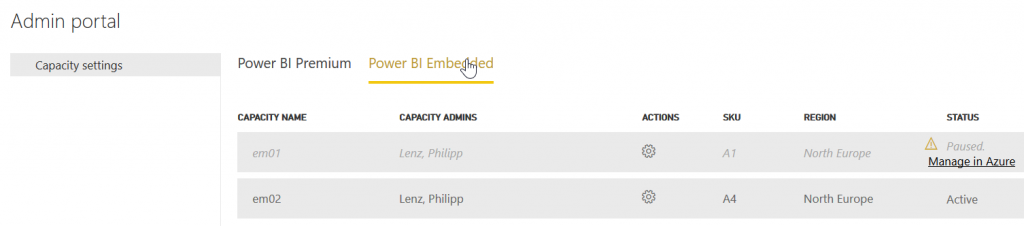
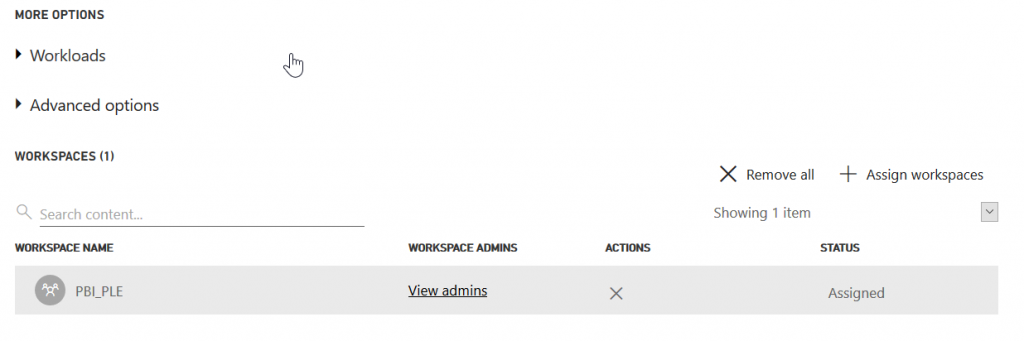
Click on the name and assign a workspace
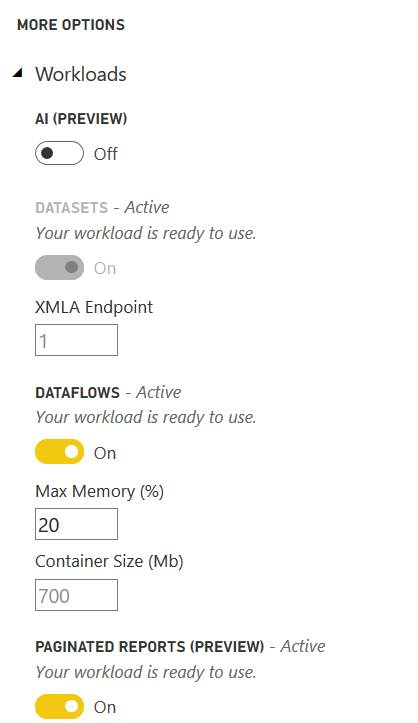
Activate the Paginated Reports Feature.
After committing this page, your workspace becomes a diamante after his name, this symbol shows you, that the workspace uses premium capacities.
Now you are able to upload Paginated Reports. To create a report, you need the Power BI Report Builder https://powerbi.microsoft.com/en-us/blog/power-bi-paginated-report-builder-now-available/
After you successfully installed the Report Builder, you can create a Blank Report. Now let’s add a data source:
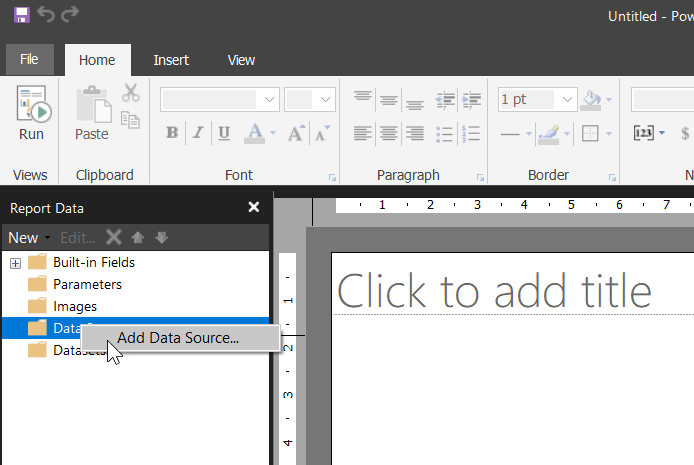
Choose as a data source driver “Enter Data”
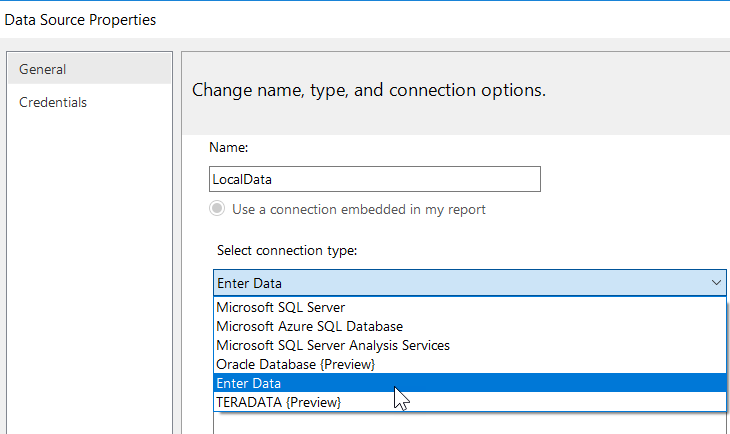
Next
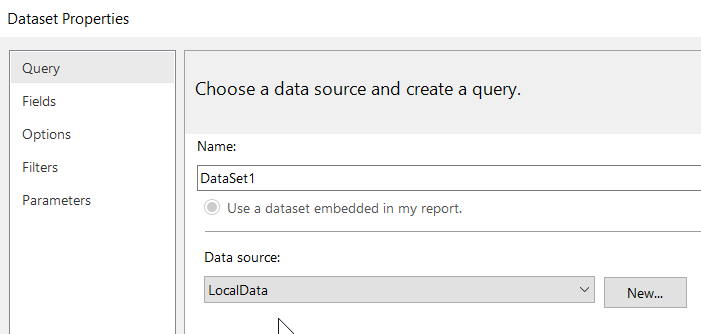
add a new dataset and choose the new data source
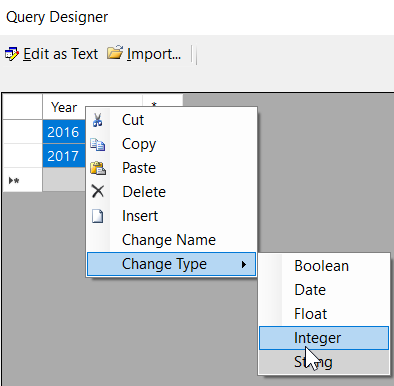
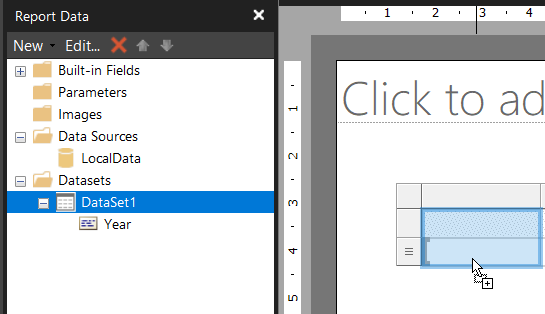
Click on “Query Designer” and enter some data. In this case enter some some Years, name the column “Year” and change the datatype to “Integer”
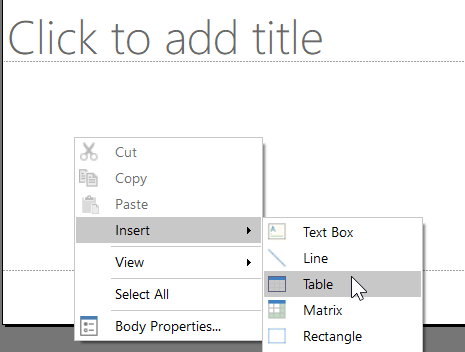
After you have entered some data, press okay on the Query Window Dialogue and make a right click on the report canvas to add a new table:
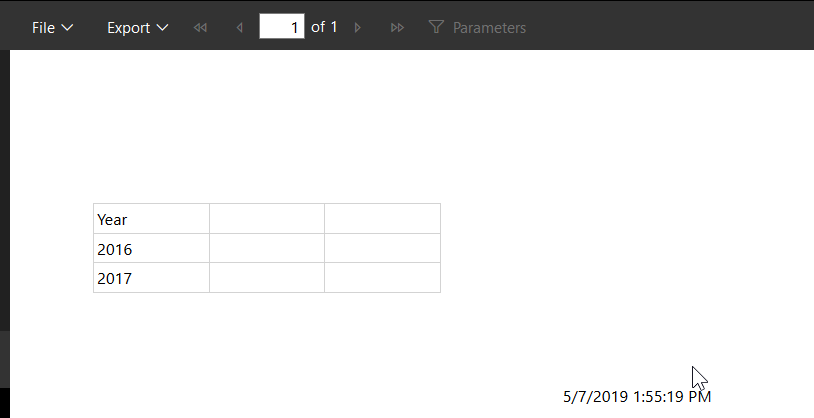
Next drag and drop the year column from the dataset into the table
Now, you can save the report on your hard drive – I named it “First Paginated Report”. Currently the is no option to save the report directly to PowerBI.com. (Please note, when you go to the preview of the report designer, in the most cases no data will be displayed in the report designer – but no worries, on the Power BI Tenant it works correctly)
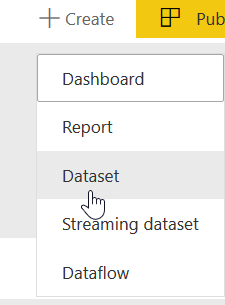
Next let’s go to the Power BI tenant and choose our workspace with the assigned capacities and choose Create and Dataset.
Click on Files – Get.
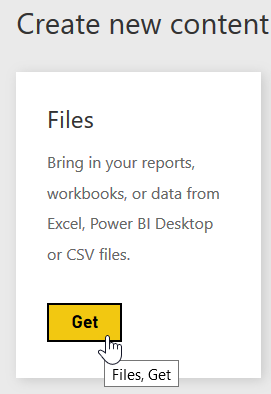
On the next windows choose local file and select our newly created Paginated Report.

Now you will find your newly created reports in the „Reports“ section
That’s it! You have created and deployed a Paginated Report. Now you can view it also in the mobile app, print it and export it to other file formats.
After that, please pause your Azure SKU for Power Embedded. Because if it is paused, it does not cost any money!
Thanks for reading.